Front-End Web & Mobile
Getting started with Android testing on AWS Device Farm using Espresso – Part 3: Uploading your Android application to AWS Device Farm
AWS Device Farm is a service that allows you to test your Android, Fire OS, and iOS apps on real devices (not emulators or simulators) in the AWS Cloud. You can upload your apps to the cloud and run Fuzz tests to simulate random activity or leverage the built-in app explorer, which crawls your app and captures screenshots as well as performance metrics and logs. To take further advantage of the service you’ll need to leverage one of the supported test automation frameworks. That’s where this series of blog posts comes in.
In Part One and Part Two of this series you created a basic Android application and configured it to use Espresso for running automated tests and taking screenshots. Now that you have your development and build environment setup you can upload the app to AWS Device Farm.
Upload into Device Farm
Log onto your AWS Account and under Mobile Services select Device Farm. You may be prompted to change to the US West (Oregon) Region.
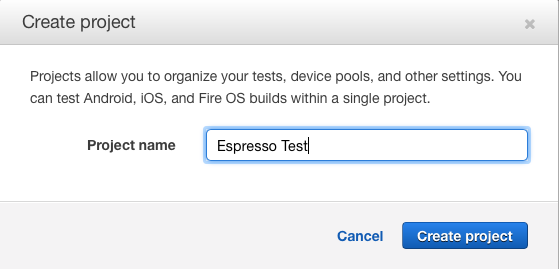
Click “Getting Started” or the “Create a new project” button if you have an existing Project. Call the Project “Espresso Test.”
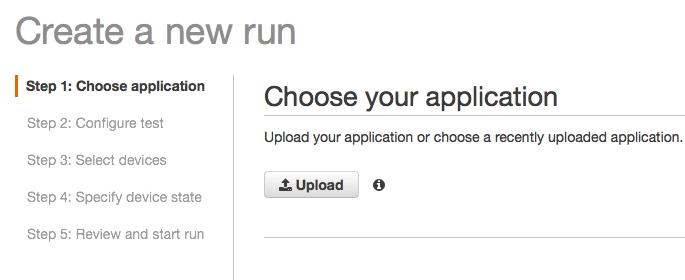
Go into the Project and select “Create a new Run.” Choose the “Upload” button to browse to the APK file that Android Studio generated.
Depending on your operating system, the output location for the APK file will be different. In this simple example we have built an unsigned application for testing purposes on OSX so the default location will be something like:
/Users/username/AndroidStudioProjects/SimpleDemoApp/app/build/outputs/apk
Notice in this directory there will be an “app-debug.apk.” This is the file we will upload here but take note of the “app-debug-androidTest-unaligned.apk” file as it will be used next.
Once you upload this file and it is processed by Device Farm you will see a message similar to below.

Press next and select “Instrumentation” as the test type. Again, press the “Upload” button. However, this time select the “app-debug-androidTest-unaligned.apk” file. This is where Android Studio has placed the test cases you created in the project structure before. Once the file uploads successfully you will see the Test Package information and Runner displayed.
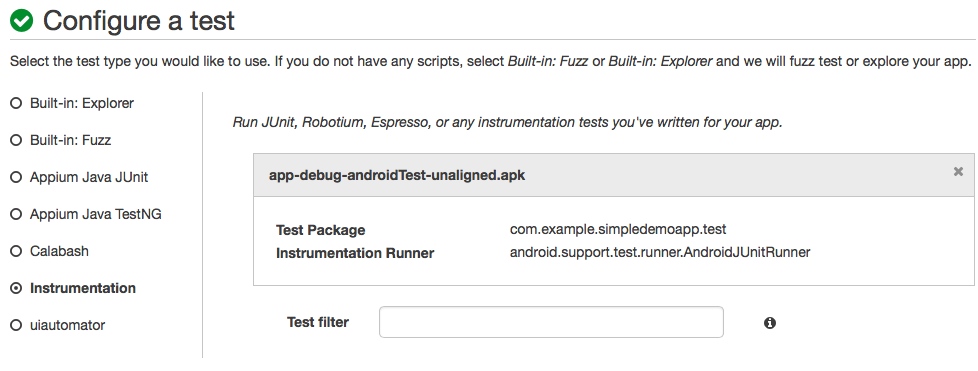
If you wanted to you have the capability to apply a test filter and run a single test case rather than an entire suite. This can be very helpful if you have resolved an issue and don’t need to retest an entire suite during development. For this tutorial we will leave the filter blank.
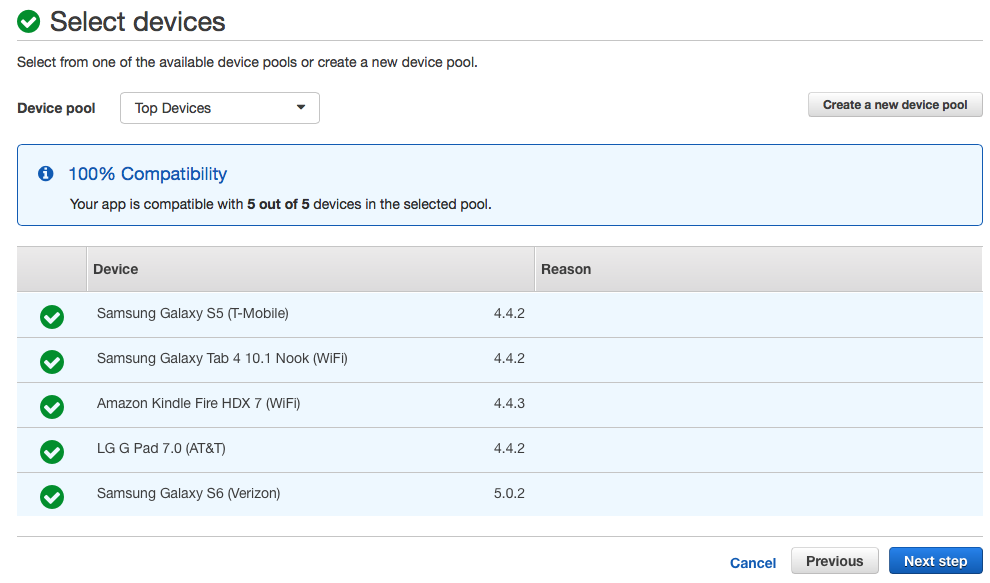
On the next screen you will see a list of devices that your application has compatibility. If you wish you can create a custom device pool or accept the default list of devices.
Press “Next step” and take note of the device state options. If you wanted to on this screen you could modify things such as latitude/longitude, locale, radio states, or install other applications – perhaps if you would like to test dependencies on other apps.
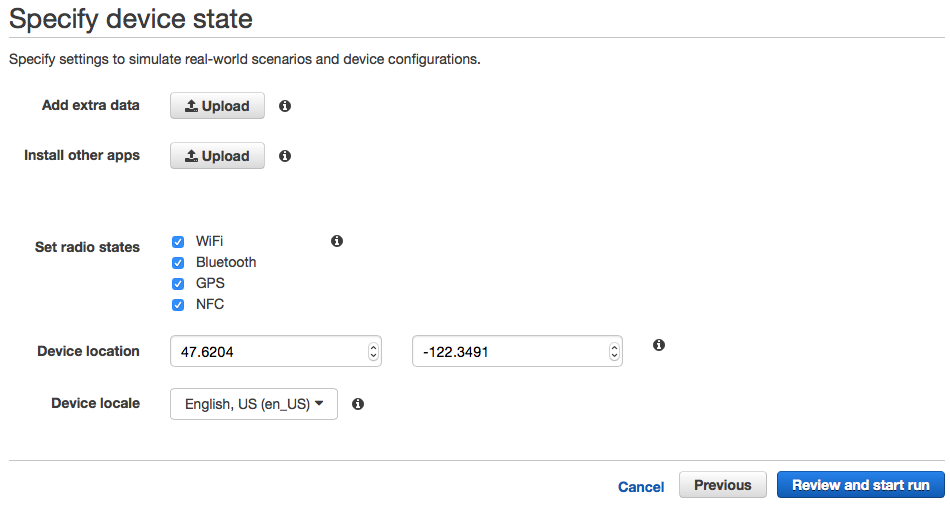
One more thing worth pointing out is your ability to “Add extra data.” A good use case for this would be an application, which is quite large and leverages an APK Expansion File. If you have an application that makes use of this capability then this would be the time for you to upload your zip file to the Test Run.
Click “Review and start run.” Then, assuming everything looks okay, click “Confirm and start run” to begin testing your application. After a moment you will be able to click on the run and see some initial results. Click on one of the devices such as a Samsung Galaxy S6 (Verizon).
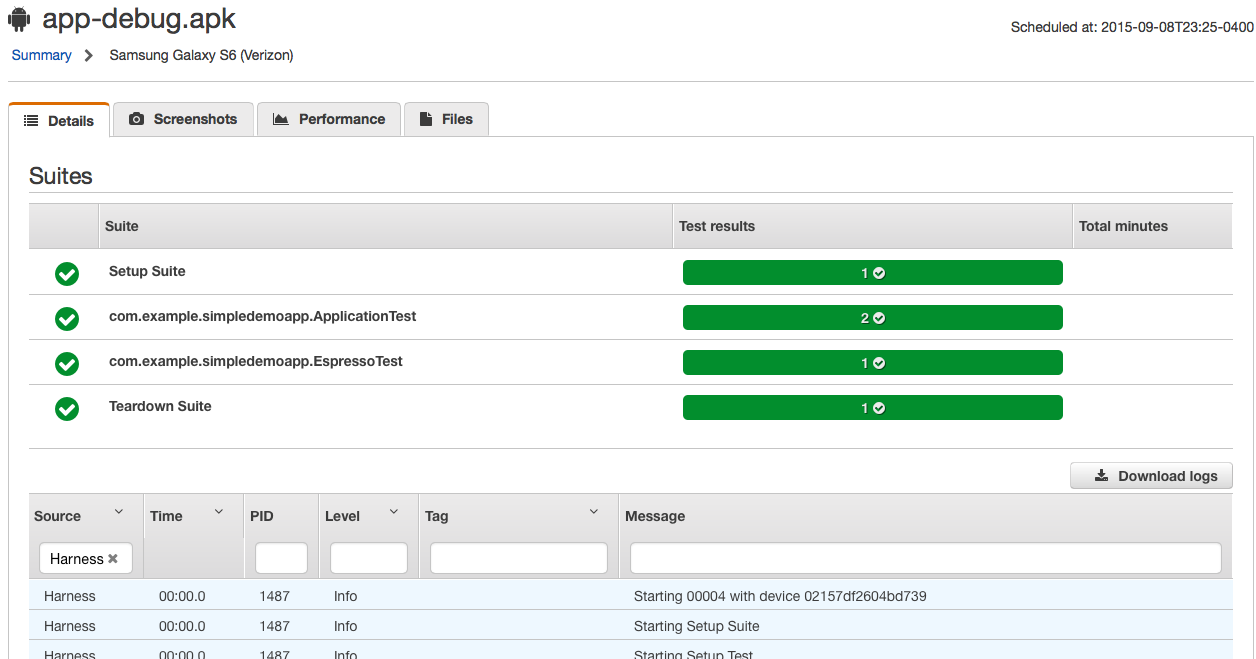
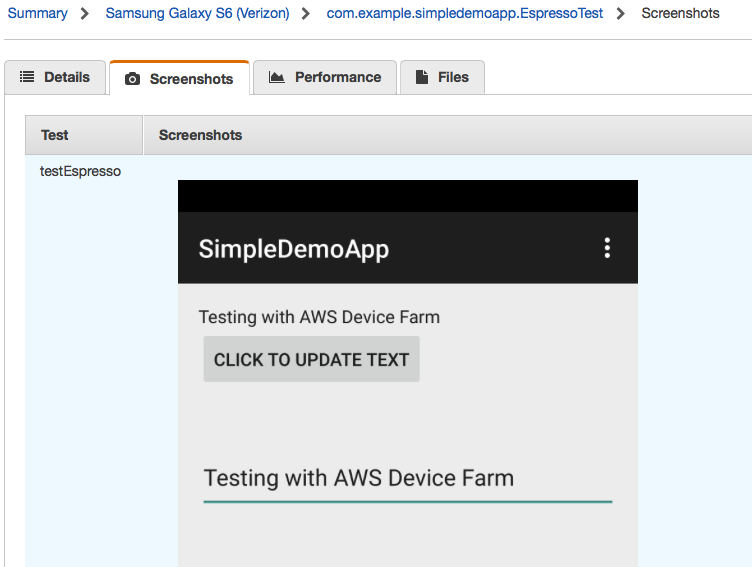
Note the package names in the Test Suite. Click on “com.example.simpledemoapp.EspressoTest” and you will see the “testEspresso” method you created earlier as well as some logging details in the lower pane. Clear the “Source” filter by clicking the “X” next to “Harness” and you will see all of the messages including the logcat messages from your code listed. To filter more specifically you can use wildcards in the “Message” field as seen below.

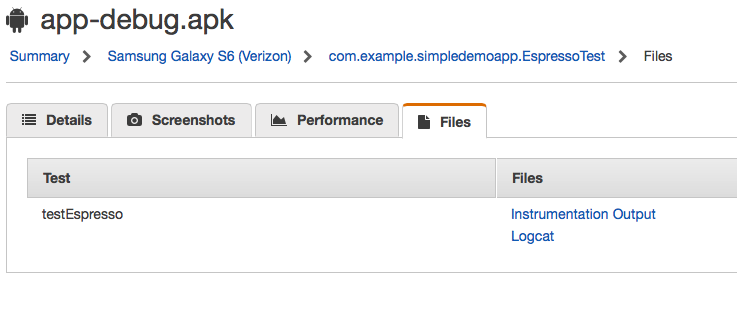
You can also download the raw logs by clicking on the “Files” tab at the top of the screen and process these files using the tools of your choice.
Finally click the “Screenshots” tab and you will see an image that looks like what you saw earlier when running the sample application locally in your emulator.
Conclusion
That concludes this series on getting started with Android test automation using Espresso and AWS Device Farm. Hopefully you now have the foundation to write your own tests that exercise the functionality and business logic of your Android apps. For additional pointers and sample code for Espresso and other frameworks, check out our sample Android app and tests on GitHub. If you have questions or comments please join us in the comment section below.